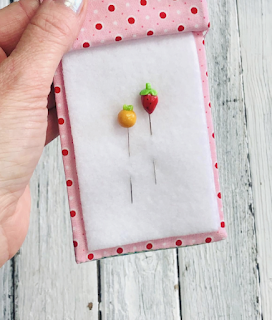
Sew up this darling needlebook in no time and use up some sweet little fabric to showcase in the centre! These make great gifts for your quilting and sewing friends.

You can find the custom made pins in my shop on Instagram @berry_birdy_shop
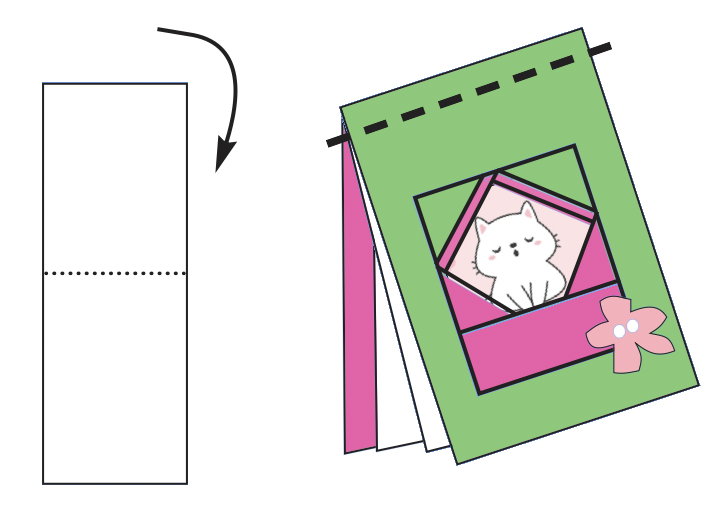
Instructions;
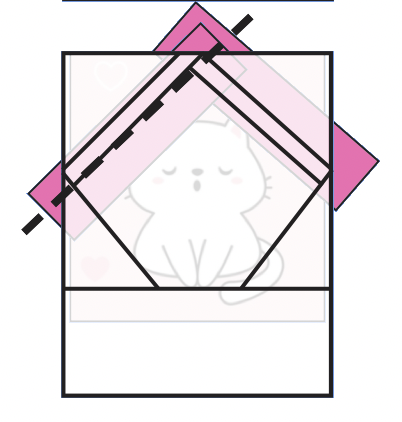
Copy the template to your desktop and print it out so it measures 2" X 2 1/2". Cut it out leaving at least 1/2" around the outer edges.

1. Shorten your stitch length to 1.5 - 1.8mm.
2. Beginning in the centre of the envelope, place the cat (or other fussy cut fabric in the centre covering the #1 space. The pieces need to be slightly larger than the area they are covering.

3. Place a pink strip along the #1 and #2 line with right sides together on the wrong side of the template (the back of the paper). Pin in place. Hint; It can be helpful to hold it up into the light for positioning.
4. Flip the template over and sew along the line in between the #1 and #2 areas extending at least 1/8” beyond the line on either end—this is your seam allowance. Make sure your fabric is at least as large as the section next to it that it will be covering. Trim any excess fabric along the seam to about 1/8”.

5. Turn the template to the fabric side (the wrong side of the paper) and open the seams. A wooden seam roller can be helpful for this.

6. Place on your next fabric right side down onto the previous pieces. This one will need to be sligtly bigger as it is covering #3. Pin in place.
7. Flip the template over and sew along the line next to #3.
8. Trim any excess fabric along the seam to 1/8”.
9. Repeat this process sewing the adjecent pieces until you have sewn up to #8.
10. Remove the paper. The tight stitches help with this, but you may also wish to spray it lightly with water, wait a minute, then remove the papers. You may find it helpful to use tweezers. Do not get too picky about small pieces of paper, it is fine to leave some and, even at times I have left them all especially on a tiny project such as this.
11. Sew a 1” X 2 1/2” green strip to either side of the envelope. Press seams open.

12. Sew a 1 1/2” X 3 1/2” strip to the bottom of the envelope.
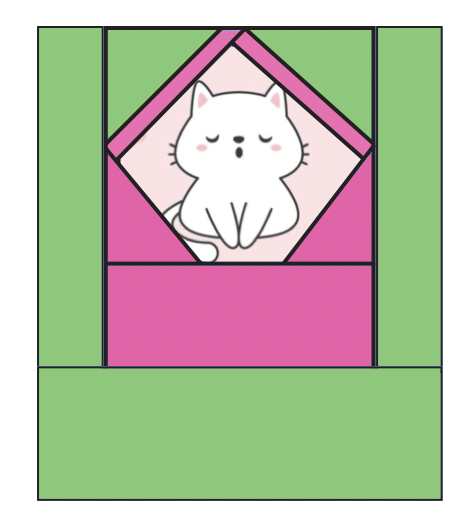
13. Sew a 3 1/2” X 6 1/2” piece of green fabric to the top of the envelope.
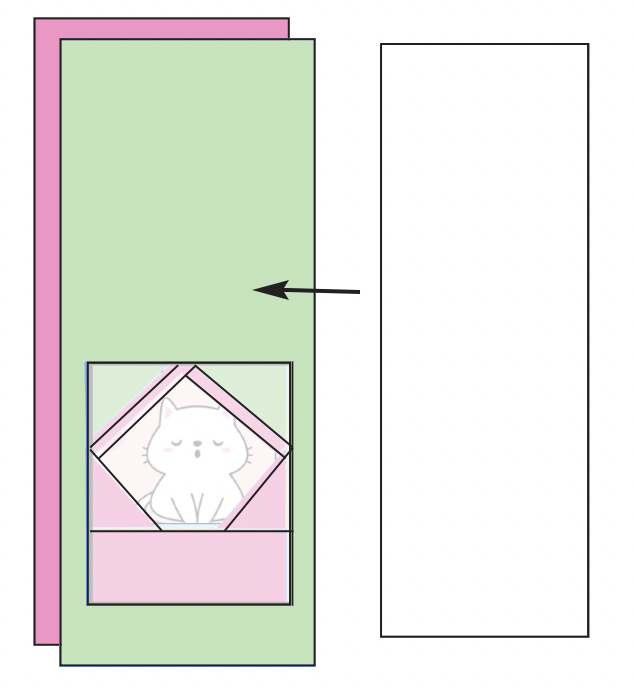
14. Layer the pink dot fabric and the needlebook front with right sides together. Place the fusible batting piece in the centre leaving 1/4” on all sides.
15. Sew a 1/4” seam around sides and bottom, just catching the edge of the batting in the stitching, leaving the top open for turning.
16. Turn right sides out and gently press out corners with a pair of scissors.
17. Slip stitch opening and press well.
18. Cut 1 piece of white felt measuring 3” X 8”. Place it on the pink dot fabric (inside the needlebook).
19. Fold the needlebook in half and stitch ascross the top 1/4” from the edge. Be sure the felt is caught in the sewing.
20. Sew a lace or ribbon along the top edge if desired.
21. Sew the flower button on the bottom corner of the envelope and tie with embroidery thread.
You can find more of my little patterns in my Etsy shop!
Comments
Post a Comment